IMPORTANT: Before completing the required information to activate the MSI connector , you will need to contact and register with MSI
|
STEP #1
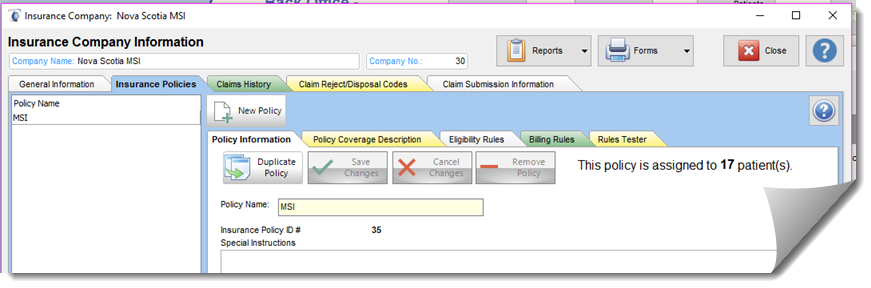
To Setup MSI you require to complete and enter the information in the Insurance Manager. To complete the MSI profile you must complete all fields highlighted in Yellow as well as select the Insurance Profile field to show Nova Scotia MSI as the selected value.

Payor ID: Not used in Canada, you may enter any unique number you wish to identify MSI. In the US the government assigns a unique number for each insurance processors providing a simple reporting key when generating reports for an insurance claim processor. This field can also be used in Canada for reporting purposes if a unique value is entered.
Name of the Insurance Company : Nova Scotia MSI
Address: Address of your MSI claims office.
City: of your claim office
Province/State: of your claim office
Insurance Profile: Select Nova Scotia MSI. This tells Filopto which dialogue screen and connector to use when preparing and processing claims. If you select the incorrect profile your claims will be rejected.
Insurance Claim Creation Settings: Do you want Filopto to validate the claim information: Select YES. This will use MSI claim pre-scrubber to minimize possible claim rejections. If set to No, simple omission or errors will not be identified causing a possible higher level of claim being rejected by MSI.
Insurance Types: Identifies what type of insurance claims covered by MSI.
Status: Change to Active once you have created a MSI Policy under the Insurance Policies tab.
You may enter data in the other fields to provide you with additional information related to MSI.
STEP #2
The next step is to complete your Provider/Office profile for use with the MSI Insurance. The Claim Submission Information tab registers the provider information for submission, the rate schedule, Connection Configuration, as well as it contains the drop down list for the various codes used by MSI. MSI provides materials that list the codes you will need to use. You can enter all of the codes or only the ones required by your practice. You must follow MSI direction for use of this module.
Provider Information Tab: This tab records the Provider(s) Information account numbers provided by MSI. This information will be used to submit claims to MSI, make certain that the information entered is correct or payment may be refused or sent to another MSI account if incorrect numbers are used.
Select the Employee Number that identifies the Provider having an account with MSI.
Enter the Service Provider Number provided by MSI which identifies the provider.
Enter the Provider Type Code provided by MSI
Enter the Specialty Code provided by MSI (if a code is assigned)
Enter the Pay To Code provided by MSI.
If you are not using the providers personal information numbers for payment but rather the Facility/Business Arrangement Numbers for your office the next section must be completed using the MSI provided information. Some of the numbers entered in this section must also be entered in the Office Information Tab for a claim to be processed.
If the Facility/Office is getting paid versus the provider place a check mark in the "Use the Office's Facility Functional Center and Business Arrangement Numbers" field. You must also complete the other related field : Facility number, Functional Center Number, Business Arrangement Number depending on your arrangement with MSI.
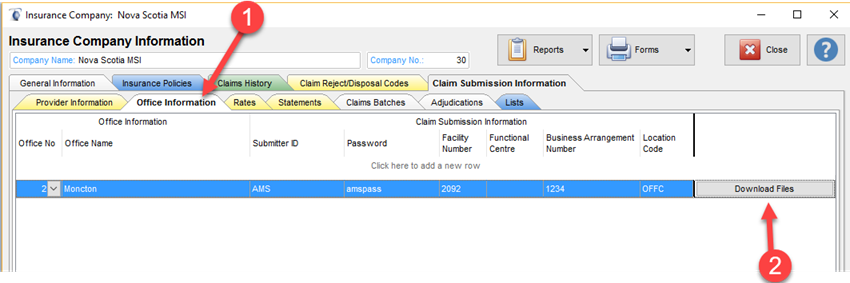
STEP #3
Complete the Office Information tab. Enter the MSI provided information.
You can create a separate record for each office location submitting independently claims to MSI. If you are sending claims only via one account you will only need one entry in this tab.
Select the Filopto Office Number identifying the office making the claim submission.
Enter the Submitter ID provided by MSI.
Enter the Password provided by MSI.
Enter the Facility number provided by MSI (if required)
Enter the Functional Center number provided by MSI (if required)
Enter the Business Arrangement number provided by MSI (if required)
Enter the Location Code number provided by MSI (if required)
Once you have completed the information the download button at the right of the screen permits you to connect to MSI using your account numbers and download the files required for properly completing MSI Claims. The Download button also downloads your statements and adjudication records.
IMPORTANT: MSI updates on a regular basis the files used by the system. We recommend that you use the download button regularly to insure that you are using the correct claim files.
|

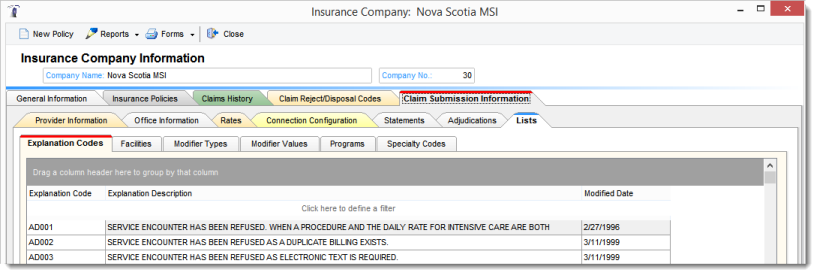
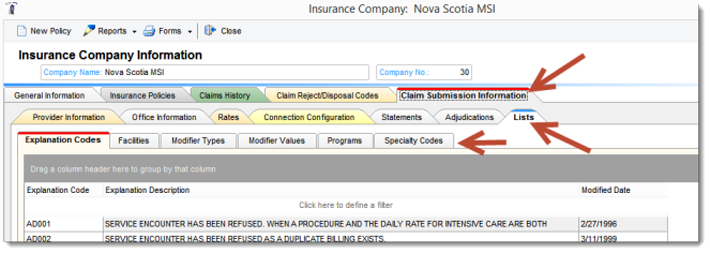
The List tab displays the various list required for MSI operations, such as the Explanation Codes and Modifier Types, Specialty Codes etc.
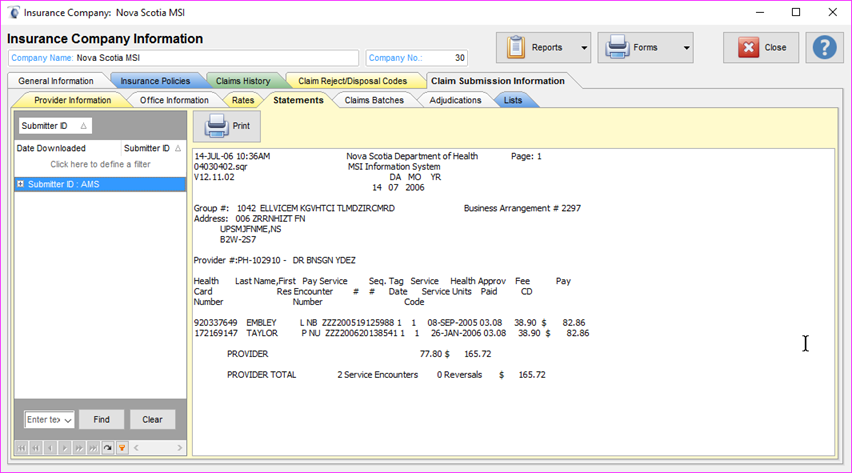
MSI Statements
For Filopto to properly function you must download (2) both the Text Based Statement and the Electronic Based Statement files. The electronic based statement file is used by Filopto to post payments and adjustments provided by MSI. If you do not download the MSI Electronic statement version your Filopto claims and invoices will not be updated with MSI payments.
The Statements tab displays a list of all Statements received from MSI. The user can print these statements if required. Using the grid located at the left of the screen a user can search or sort the available statements for easier access.