
Artificial Intelligence MSI Connector
Filopto support claim submission to the Nova Scotia Medical Services Insurance Programs (MSI). When using the Nova Scotia MSI claim form the following claim screen is presented. The user must complete the form per the MSI directives and submit the created claim for adjudication.
IMPORTANT:
Each claim jurisdiction has specific requirements on how to successfully submit claims. YOU MUST REVIEW AND FOLLOW YOUR SPECIFIC JURISDICTION CLAIM REQUIREMENTS BEFORE USING THE CLAIM CONNECTOR.
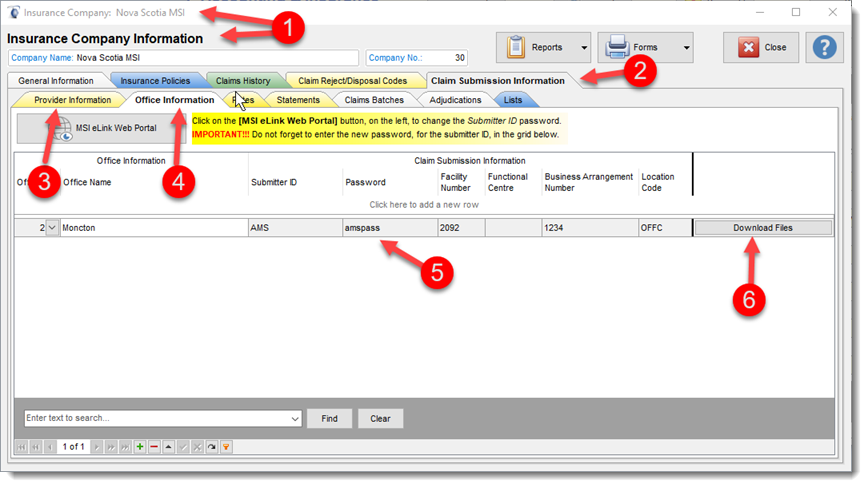
For the Claim submitter software to function properly, you must enter your NS-MSI credentials in the Nova Scotia MSI insurance profile (1) you create. First enter your Provider information in the Provider tab (3) and then enter your NS_MSI logon credentials (5) in the Claims Submission Information tab (2) / Office Information sub-tab (4).
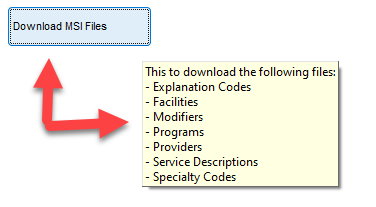
Once you have properly entered your NS-MSI credential you must download the files required for the claims to be properly submitted by using the download Files (6) button.
See MSI Setup for more details.
|
NS-MSI Tabs
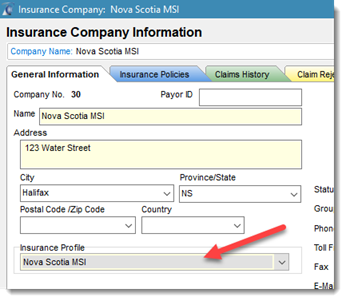
When you create an Insurance company that is assigned the NS MSI insurance profile, the NS-MSI Claim Submission Information tab will appear on the Insurance Company Profile screen.
NS-MSI How to Set Up the Connector
The Claim Submission Information tab contains sub tabs that control the NS-MSI claims submissions. All pertinent information must be entered prior to submitting any claims. Incorrect information will result in your claims being rejected by NS-MSI.
To setup a MSI account connection with Filopto users must :
1) Enter your MSI account Information,
2) Establish a MSI-Filopto connection
3) Download the core MSI files use by the MSI connector
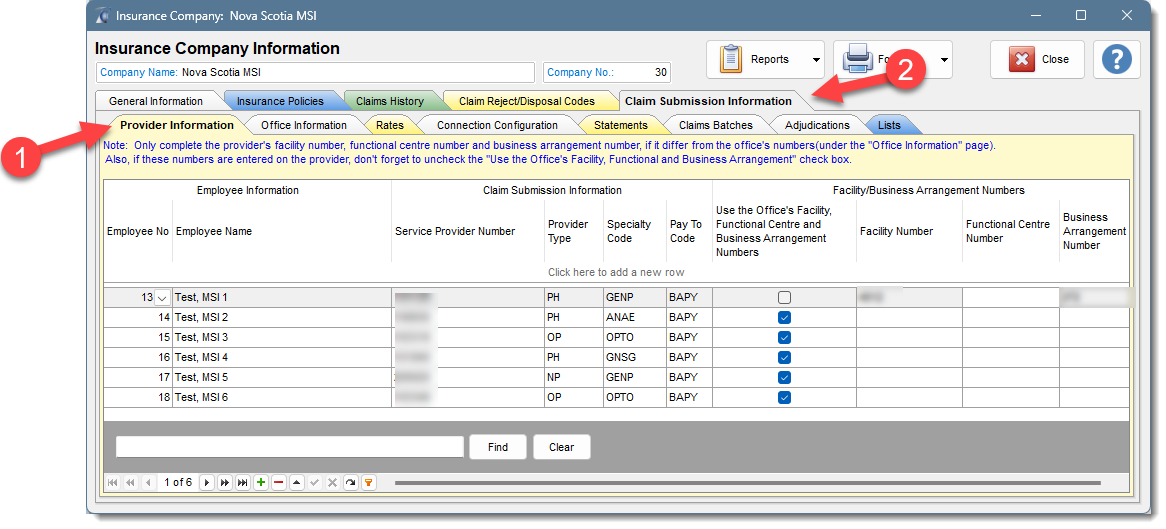
1) Create your MSI connection account using the Provider information tab and Office information tab.
An entry must exist for each provider, and must be completed per MSI requirements.
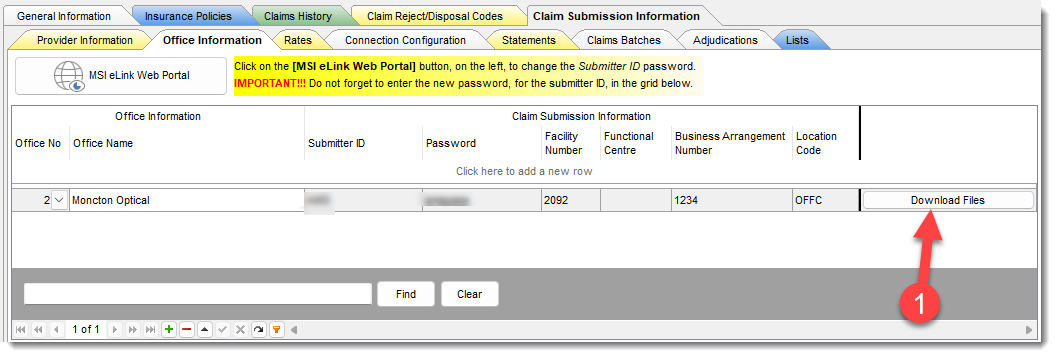
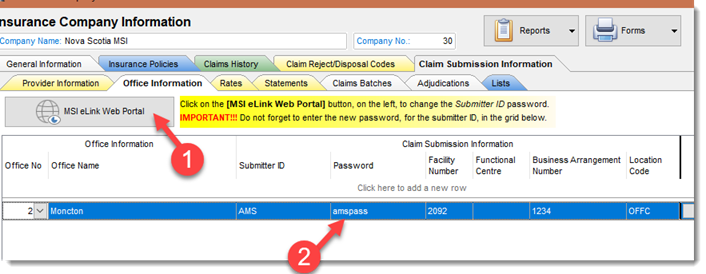
2) The Office Tab allows you to enter the credential to connect to MSI. The information required is provided by MSI. Test the connection credentials by using the Download button (1) which will verify the connection credential and if they are valid will download the core files required by MSI to be able to use the connector.
3) From time-to-time MSI will make changes to the core files you downloaded in step 2. To keep the core files up to date you should on a regular basis use the Connection Configuration tab to download (4) the latest updates to the MSI system.

NS-MSI Claim Submission Tabs
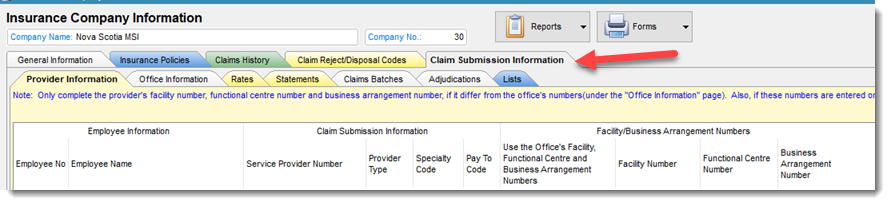
Provider Information Tab: contains the provider information that will be used when submitting claims. this information will be provided to you by NS-MSI and represents the providers account with NS-MSI.
Office Information Tab: contains the logon credential to connect to NS-MSI. It must be completed and the associated files for your account must be downloaded (see download button) prior to submitting claims.
Rates Tab: (MSI Rate Changes) contains the Claim rate to use with the units for a service. The rate entry in this tab governs how your claims will be rated and adjudicated. You must manually enter the rate provided by MSI by creating a new rate record and entering the start date and the rate to be applied from that date.
IMPORTANT: Remember to expire old rates to eliminate the possibility of Filopto using the incorrect rate. Filopto looks for the rate that is effective during the time period of the claim, if an effective and expiry date exist only the rate fitting that time period will be used. If no expiry date exist Filopto will see the rate as still active and to be used for claim submission.
Statements Tab: List all of your statements received from NS-MSI
Claims Batch Tab: contains logs of all claims batches sent to NS-MSI
Adjudication Tab: contains the adjudication records received from NS-MSI
List tab: contains various list downloaded from the Office Information tab and that are used in the Claim submission process.

Claims created and ready to be submitted are located in the Back Office view using the  button. Once claims are identified to be sent and the user sends the claims the processing screen will be displayed showing the progress of the transfer to MSI. DO NOT interrupt this process or the file being sent will be corrupted and your claims refused.

Once the Processing Claim Completed message appears a user can view the status of the submitted claims. Using the View Adjudications button a user can view the results of his file upload. The user can open a claim by double-clicking on the adjudication record displayed.

Inventory Items
Users can define default claim parameters to use for specific inventory items: in the example below we use an Office Visit listed in the inventory/services section and assign it a MSI Procedure Code and modifiers. Once the appropriate code is saved with the inventory item, every time this inventory item is used in conjunction with a claim, the selected procedure code will be automatically used for the claim item.

Accessing the MSI elink web site
Users can access the MSI eLink web site by using the button (1) that appears in the MSI Insurance Claim connector or
going to the web site: https://www.MSIeLink.ca.
Changing your MSI eLink Password
How will a submitter change their current password to a complex password to enable claims submission?
The submitter will take the following steps, to change their current password to a new complex password:
1. Use their preferred browser to navigate to https://www.MSIeLink.ca. .
2. Login using their Submitter ID (3 digits) as the User ID and their current password.
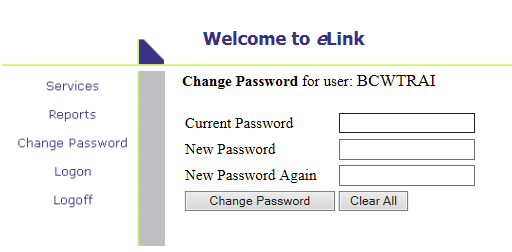
3. Select “Change Password” from the menu on the left side of the screen.
4. Using the submitter’s default password, create a new password. The new password requirements are:
▪ New password is not to match the current password
▪ Minimum password length is 14 and maximum length is 20.
▪ Must contain at least 1 lowercase character, at least 1 uppercase character, at least 1 number, and at least 1 special character.
5. Save the new password by selecting the Change Password button.
6. Save the new password in the appropriate Filopto record in the NS-MSI Office Information data grid (2).
Note: The new password will not have an expiry date and can be changed whenever the submitter chooses, but the submitter will need to know their current password to change it to a new password.
Update / MSI core file
MSI provides from time to time updates to various files used. It is important to update these files to avoid claim issues.


