
On the invoice screen, there is a Receive Payment  button. Selecting it will present the following screen where you can select the Patient Payment option.

1) PATIENT PAYMENT ( also see Receive Patient Payment for more details)
Apply Credit Memo
If there is any available credit for this patient, the following screen will pop up for you to apply or not. if no Credit is available the screen is not presented to the user.

Once you selected any available credits you can proceed to enter the payment information.
By default you will be presented with the total amount due by the patient in the Patient Amount Due field. If you wish to pay other invoices from other individuals at the same time (for example; family members) you can add the invoices by selecting the Add Another Patient's Unpaid Invoices (1) button. You will be presented with the Patient Manager from which you can select the patient to add. You can repeat as many times as required to add all of the invoices from the various individuals that you want to pay at the same time. A confirmation pop up is presented identifying the number of invoices and amount to be paid for the selected patient.

Enter the Payment Method and Payment Amount field (required fields). If you are using a Credit Card connector you will be presented with the required credit card screen to complete the transaction. (see Credit Card and e-Check Payments available only in the US version or when using a Custom Connector)
The Pay Amount Due button will enter a payment equal to all outstanding amounts the patient owes as displayed in the Patient Amount Due field.
You can record the check number or any other reference number by entering it in the Cheque / Reference No. field.

When you are ready to proceed with the payment select the Apply button to accept the payment amount. The Payment Totals section will displayed the number of invoices that will be paid with this payment. By default Filopto will apply the payment from the oldest unpaid invoice item to the most current item and invoice.
If you wish to not have Filopto automatically distribute the payment you can change the payment allocation by selecting the "X Invoice Will be Paid" (2) button. a Listing of all invoices to be paid will be displayed.
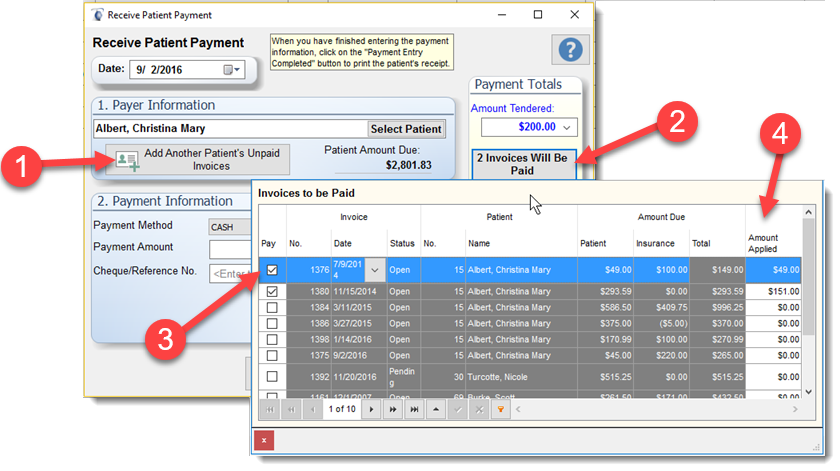
Removing the Check mark (3) in front of the item being paid and allocating the payment to the appropriate item by placing the check mark in the Pay (3) field and the amount of the payment in the Amount Applied (4) field. (see Apply Payment to Specific Invoice) will redistribute the amount to be paid to the invoices you selected.
Paying invoices for Family Members / Guarantor
The payment screen allows a user to make payments for a family member or other person they are guaranteeing. By identifying family members, in the Patient file Household will permit at payment time to view and select the invoices due. The same applies for people added to the Guarantor list in the Patient file.
Important:
Outstanding invoices from people added to the household list or guarantor list will by default be added to the Patient Amount Due (1) field displayed on the payment screen. Users can apply a payment to the appropriate invoice by using the X invoice Will Be Paid (2) button and applying the appropriate amount to the invoices of the other people (Family/Guarantor) shown in the patient invoice list (3).
|

Change provided to Patient
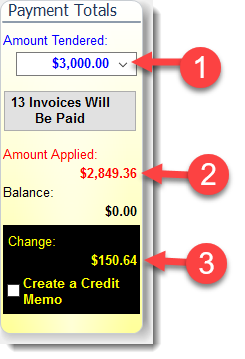
If the Payment Tendered (1) is greater than the payment Amount Applied (2) the Payment Totals section will display the Change (3) to be provided to the patient. The change provided to the patient on the transaction is recorded in the payment ledger.
If you click on the Cancel Payment Entry button, the payments will be canceled.
Selecting the  button will save(post) the transaction to the patient file.
If the Invoice Total Balance Due is $0.00 as a result of the payment entered, the invoice status will be automatically set to Closed.
Receipt
Print a receipt. By default the system will offer the user to print a receipt for the Patient.

Print Invoice
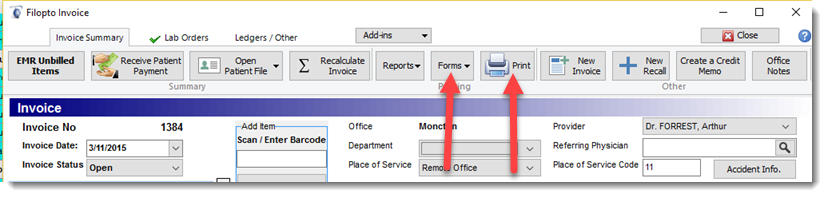
To Print the invoice, select the form or print button located in the top tool bar and select the invoice form. If you created a custom receipt form, the same button can be selected to print the payment receipt form.
2) Insurance Line Item Payment
To enter an Insurance payment directly to an invoice line item, select the Insurance payment option in the Invoice screen.
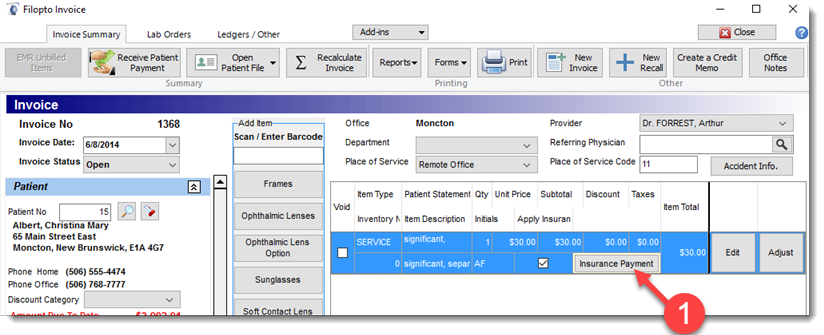
You are then presented with the following screen where you enter the insurance payment information:
Enter the payment date and time
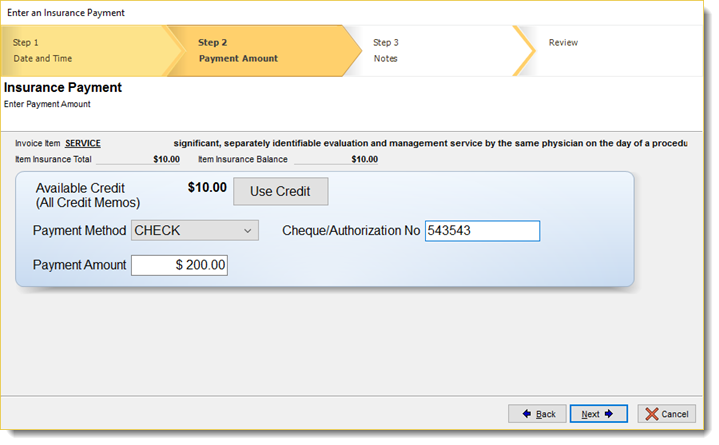
Enter the payment type and amount with any other required information.
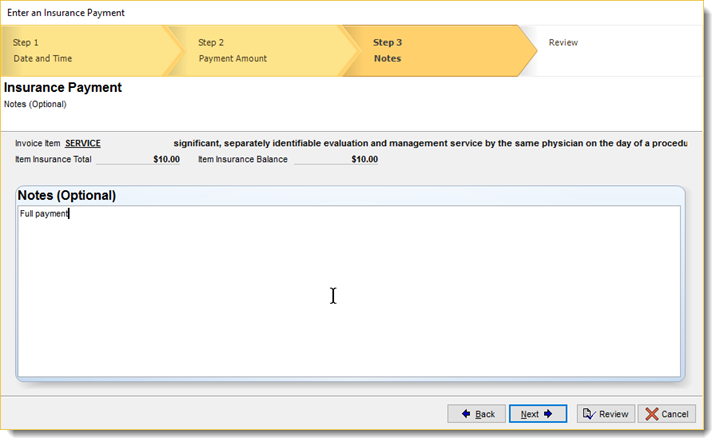
Enter any applicable note to record the payment and then select the Review button to complete the transaction.
Select the OK button to complete the transaction
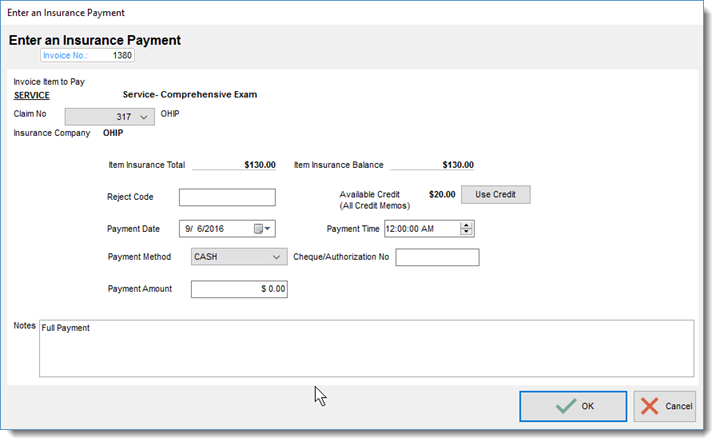
Field Definition and Use
Invoice Item : A drop-down list of items contained on the invoice. The user can select which item they wish to refund.
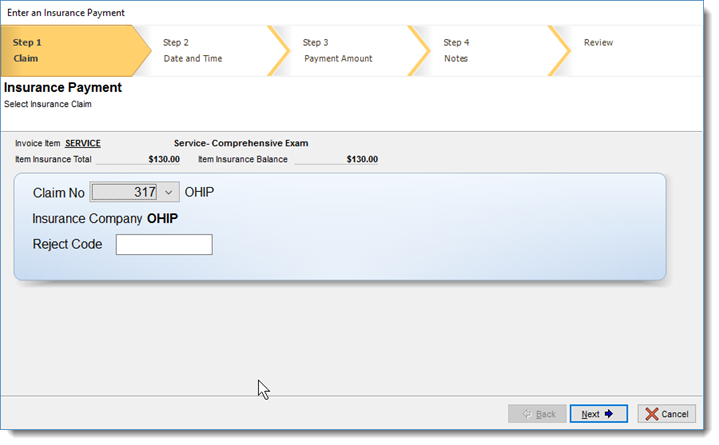
Claim No: The claim for which the payment is made. Drop down list of all claims for the given invoice. A user can choose from the list the claim ( insurance company ) making the payment.
Item Insurance Total: The amount of the item which is automatically entered
Item Insurance Balance : The total amount for this line item not yet paid.
Reject Code: Enter any applicable reject code.
Available Credit: The credit memos available for this insurance company. use credit memo button allows you to apply the credit.
Payment Date: Insurance payment date
Payment Time: the time stamp for the payment
Payment Method: Insurance payment method
Cheque / Authorization No: Insurance payment cheque number
Payment Amount: By default, the field is blank and permits the user to enter the amount.
Notes: Field where the user can record the reason for the reject code. To enter your notes, double click on the Notes field and an entry window will be displayed.
