
(OPTIONAL MODULE)
The Task Manager permits a user to create tasks and to manage them to completion. A task is a personal or work-related errand you want to track through completion. In addition to creating your own tasks, you can create tasks that you assign to others.
The Task Manager displays all assigned task associated with an employee. A subset of the Task Manager located in the Patient file and EMR File allows for the creation, tracking and assignment of Patient task to employees. A pop-up version is also available from most tabs. When you create a task from the patient file task manager, the "Related To" field is automatically entered with the patient name. This field cannot be entered via any other means.
Users can limit the number of task being displayed by placing a check mark in the Hide Completed Task field to hide all completed task. Note that if you hide completed task having notification alerts turned on ( see Notification below) you will need to first un-hide the task to be able to view it.
New task are automatically displayed in the user Task Manager under the tab Assigned to me. It is the responsibility of the user to review them from time to time.

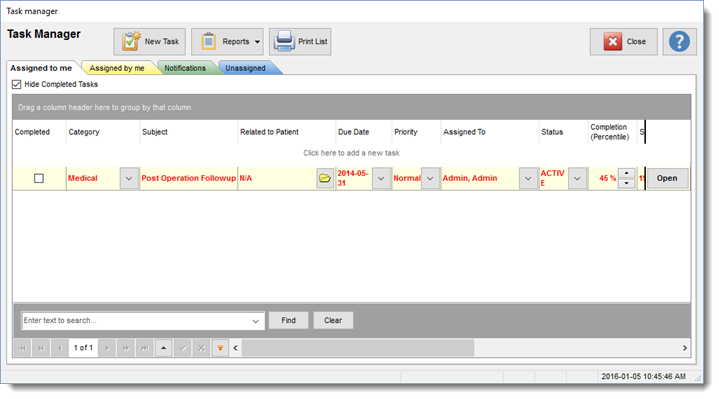
Four tabs are available to the user.
1. |
The Assigned to me tab displays tasks assigned to the user |
2. |
The Assigned by me tab displays tasks assigned by the use |
3. |
Notifications display notification messages related to tasks in the system |
4. |
Unassigned displays task not assigned to a specific user. |
A field called Hide Completed Task if active will hide tasks that have a completed status.
HOW TO OPEN A TASK
Select the open button associated with the task, located at the right of the task row.
HOW TO CREATE A TASK
To create a task record select the New Task button located in the upper left corner of the task manager screen.

Clicking on the New Task button will open a Task Information dialogue screen. Complete the Task Manager form assigning the task to the person you want responsible to complete the task. You can also select to notify you once the task is completed by placing the appropriate check mark in the notify field.
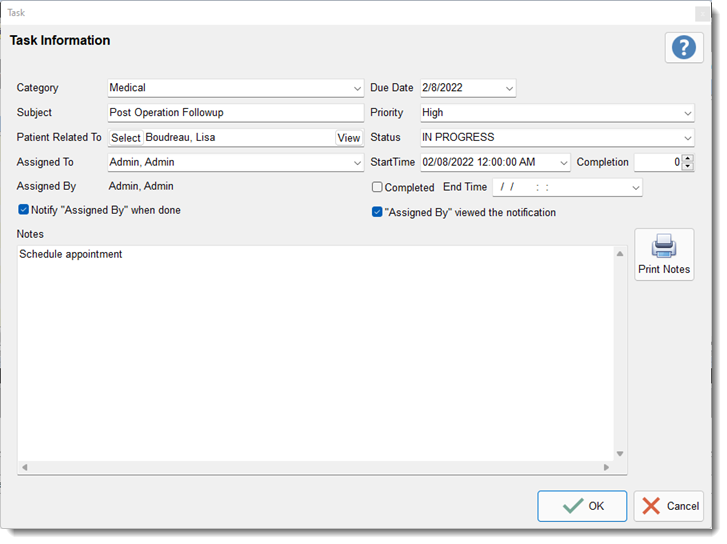
Available Fields
Category & Subject : The category and subject are user defined in the system settings. Users can use the drop down list to select the category for the task. Each category has a pre-assigned subject assigned. (user defined Categories Types can be entered in the system setting section of Filopto)
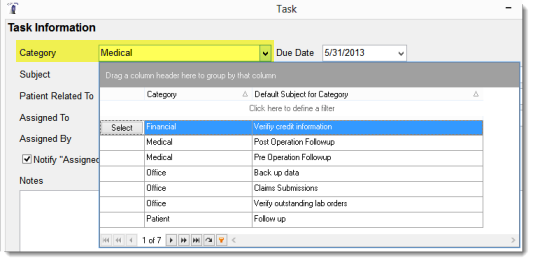
Patient Related To : The related to field, refers the task to a specific patient. It is automatically entered when the task is created from the patient file or exam. A user can select a patient or a different patient using the select button. To verify it is the correct patient, use the view button. If the task is entered via the task manager the patient related to field will be blank by default.
IMPORTANT:
All task(s) that have a Patient Related To field completed, will have the task(s) saved and listed in the selected patient - Patient File. Users, can view all task associated with a patient in the Patient Task Manager option located in the Patient File. . |

Assigned To: The person the task is assigned to. If left blank the task is not assigned and will not be delivered to anybody. it will appear in the unassigned tab.
Due Date : The date the Task is to be completed by.
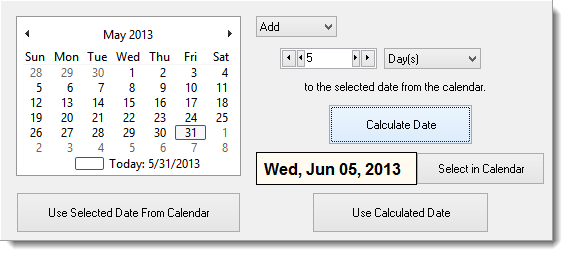
The Due Date drop down permits users to chose a date from the calendar displayed or chose a date in the past or future for the task. The ADD drop down option permit the user to calculate another date based on Adding a fix number of periods from the date selected in the calendar. The period is defined by entering the number required and selecting from the Day(s) drop down the appropriate value (day, week, month or year). Clicking the Calculate Date button will calculate the due date based upon the user selection.

Once a new date is calculated it is shown to the user for selection (Use Calculated Date button) or re-calculation.
Priority: A drop down list of priorities that can be assigned to the task
Status: A drop down list of the current status of the task. (user defined status can be entered in the system setting section of Filopto)
Start Time : When the task was started. user can enter the date and time when they started the task.
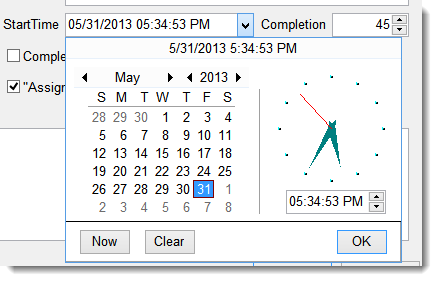
Completion: Permit users to keep track of how far along they are to completing the task. The percent completion ratio of the task. For example the task is 25% or 50% or 65% completed.
End Time : When the task was completed
Completed : If check marked the task is completed
Notes: User can enter notes related to the task.
Notify: if checked it will notify the assigner that the task is completed. It will appear in the notification tab for the assigner.
Assigned By: The person who assigned the task to the user can confirm that they have seen the notification by placing a check mark in the "Assign by viewed the notification"field. The check mark will remove the notification from the user notification tab.
Creation Date: The date the task was created - displayed in the grid view
Last Modified Date: The date when the task was last modified. - displayed in the grid view
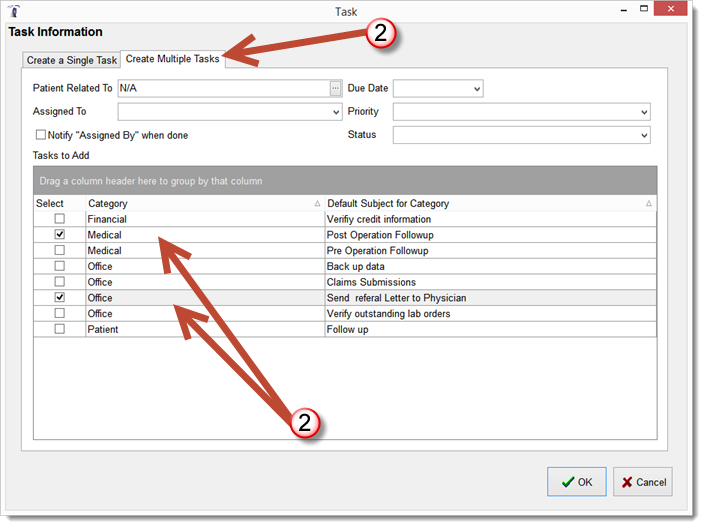
Multiple Tasks
The Multiple Task tab (1) permits users to select multiple predefined task (2) and assign them all at once. The predefined task are created and entered in the Office Manager / Filopto System Setting button under Task Manager / Task Types.
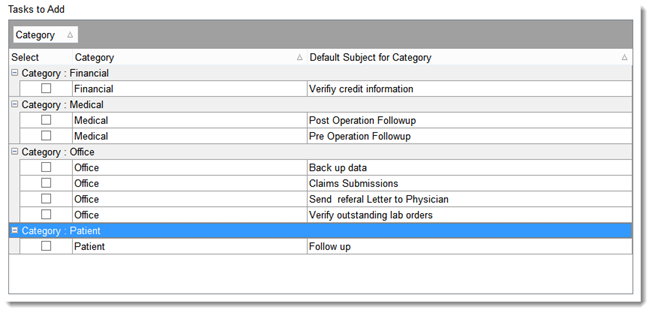
The task grid can be sorted and grouped using the grid functions for ease of use. (See Data Grid for more information).
Task Notifications
The Task notification options in the Task Manager will display in the lower right corner of the screen a message to the user that a task has been completed. The message will be displayed for approximately 30 seconds every 5 minutes until the user acknowledges having viewed the task.
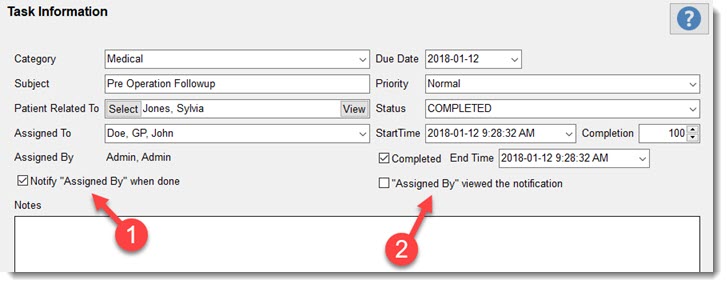
To activate the notification process when a task is completed place a check mark in the Notify "Assigned By"when done field (1). To acknowledge that the user has seen the notification place a check mark in the "Assigned By"viewed the notification field (2) this will discontinue the Notification message from being displayed.
Note that if more than one message is available, the number of messages, with navigation from one to the other is displayed at the bottom of the message notification.
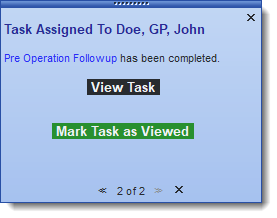
The Notification message contains 2 buttons for ease of use by the user. A user can View the Task or Mark the Task as Viewed. If the user select Mark the task as viewed the notification will not be displayed again. This action places a check mark in the "Assigned By"viewed the notification field of the task.\
Important:
Users can define how long a message is displayed by changing the settings in the Filopto System Settings / General/ Preference.
|
 The Print Notes button allows user to print any note entered in the task.
